Hello, Nomad family! 😊 Ready to upgrade your modem or switch to a different Nomad Internet service? Whether you're looking for faster speeds, better coverage, or just a fresh start, we've got you covered. Follow this easy, step-by-step guide to ensure a smooth transition without any hiccups. Let’s dive in!
Step 1: Close the Lines You Want to Replace
Before you can upgrade or change your modem, you'll need to close the existing data lines attached to your current Nomad modem. This step is crucial to ensure you’re not billed twice for overlapping services. Here’s how to do it:
1.1 Access Your Nomad Account
- Log In: Visit NomadInternet.com and log in to your account using your email address and password.
- Navigate to Account Settings: Once logged in, go to the Account Settings or Manage Services section.
1.2 Select the Lines to Close
- Identify Your Lines: Find the data lines connected to your current modem that you wish to replace or upgrade.
- Close the Lines: Click on the option to Close or Deactivate the selected lines. This action will pause the billing for these lines, ensuring you’re not charged for both the old and new services simultaneously.
Tip: Take a moment to review which lines you’re closing to make sure you’re only deactivating the ones you intend to replace.
1.3 Confirm the Closure
- Review Changes: A confirmation screen will appear summarizing the lines you’re closing.
- Confirm: Click Confirm to finalize the closure. You’ll receive a confirmation email shortly after.
Friendly Reminder: Closing the lines will pause billing, but don’t worry—it’s all part of making sure you have a seamless upgrade experience!
Step 2: Order Your New Modem or Service
Now that you’ve successfully closed the old lines, it’s time to grab your new modem or switch to a different Nomad service. Let’s get you set up with the latest and greatest!
2.1 Visit NomadInternet.com
- Open Your Browser: Head over to NomadInternet.com from your computer, tablet, or smartphone.
2.2 Browse Our Modem and Service Options
- Explore Plans: Check out our range of modems and service plans tailored for rural homes, RVers, communities, and businesses.
- Select Your Choice: Whether you’re upgrading to a faster modem or switching to a different service plan, select the option that best fits your needs.
2.3 Place Your Order
- Add to Cart: Click on Add to Cart for the modem or service you’ve chosen.
- Proceed to Checkout: Follow the prompts to complete your purchase. Enter any necessary billing information and review your order details.
Pro Tip: Take advantage of any ongoing promotions or discounts to get the best deal on your upgrade!
Step 3: Follow Nomad Activation Instructions
With your new modem or service on its way, let’s get everything activated so you can enjoy your upgraded Nomad Internet without delay.
3.1 Receive Your New Modem
Delivery: Your new modem will arrive at your doorstep. Keep an eye out for it and make sure it’s ready for setup.
3.2 Unbox and Connect
- Unpack Carefully: Open the package and remove your new Nomad modem along with any included accessories.
- Connect the Data Lines: Attach the data lines you kept from your previous setup directly to the new modem. Ensure all connections are secure.
3.3 Power Up Your Modem
- Plug In: Connect your modem to a power source and turn it on.
- Wait for Initialization: Allow a few minutes for the modem to boot up and establish a connection. You’ll see lights indicating a successful connection.
3.4 Activate Your Service
- Activation Instructions: Follow the step-by-step activation instructions included in your modem package or visit activate.nomadinternet.com.
- Enter Information: You may need to enter your email address and order number to complete the activation process.
- Select Your Modem Model: Choose your respective modem model from the options presented during activation.
- Enter IMEI and ICCID: Locate your modem’s IMEI and ICCID (SIM ID) numbers and enter them in their respective fields.
- Proceed: Click Proceed to finalize the activation.
Note: If you encounter any issues during activation, don’t hesitate to reach out to our support team for assistance!
Step 4: Enjoy Your Upgraded Nomad Internet
Congratulations! 🎉 Your new modem or service plan is now active, and you’re all set to enjoy enhanced internet speeds, better coverage, and all the fantastic features Nomad Internet has to offer.
4.1 Reconnect Your Devices
- Update WiFi Settings: If you changed your modem, you might need to reconnect your devices using the new WiFi credentials provided with your new modem.
- Test Your Connection: Open a web browser or streaming app to ensure everything is running smoothly.
4.2 Explore New Features
- Advanced Security: Enjoy enhanced security features that keep your online activities safe.
- Faster Speeds: Experience quicker downloads, smoother streaming, and more responsive gaming.
- Unlimited Data: Connect all your devices without worrying about data caps!
Need Help? Ada AI is Here for You!
We know that changes can sometimes be tricky, but don’t worry—Ada AI is always here to help! Whether you have questions during the process or need a little extra assistance, just reach out to us:
- Email: support@nomadinternet.com
- Phone: 1-800-NOMAD-HELP
- Live Chat: Available on NomadInternet.com
Final Thoughts: Seamless Upgrades with Nomad Internet
Upgrading or changing your Nomad modem is designed to be as smooth and hassle-free as possible. By following these simple steps, you’ll enjoy a better internet experience tailored to your needs—whether you’re at home, on the road, or running a business.
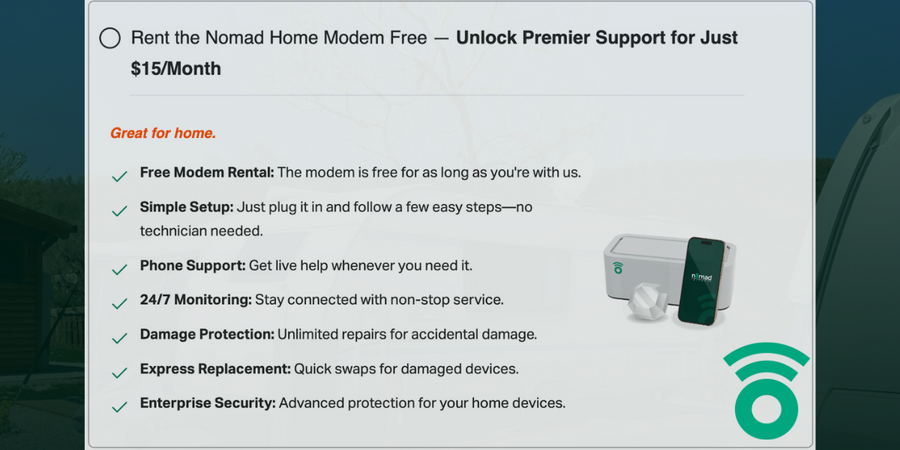
If you prefer not to opt for the premier rental and would like a free rental instead, you can visit this link: https://wiki.nomadinternet.com/s/home/doc/how-to-opt-out-of-premier-4lYusOV2ub
Additionally, if you were incorrectly charged a rental fee for Nomad Premier, we will ensure that you receive a refund.
Thank you for choosing Nomad Internet—we’re thrilled to keep you connected with the best rural internet service around!
Stay connected, stay happy! 🌟

